FYI: I put my colors incorrect for the VETERAN'S CHALLENGE. It was requested the star points be BLUE and the center square be RED .... GUESS WHO IS MAKING THIS BLOCK AGAIN! I need to take better notes.
PATTERN SOURCE :
QUILTER'S CASHE - - GO ALONG BLOCK #1
We have two request for stars ....
Red star points, blue center with white background fabrics.
The second request for star blocks is eye spy centers of various novelty prints.
Any type of star block can be submitted but we need the blocks to be 12.5 inches / finished 12 inch blocks.
Red star points, blue center with white background fabrics.
The second request for star blocks is eye spy centers of various novelty prints.
Any type of star block can be submitted but we need the blocks to be 12.5 inches / finished 12 inch blocks.
At the last meeting the star points were made using hour glass patches. The following instructions is for making hour glass patches to fit a 12. 5 inch block. I went on line to find the formula for quarter square triangles to make our star points.
THE finished patches needed measure 4 inches ( 4.5 inch prior to assembly in the block.)
Finished Block Size
|
||||||
Fabric
|
Total
Qty
|
2”
|
3”
|
4"
|
5”
|
6”
|
A
|
1
|
3-1/4”
|
4-1/4”
|
5-1/4”
|
6-1/4”
|
7-1/4”
|
B
|
1
|
3-1/4”
|
4-1/4”
|
5-1/4”
|
6-1/4”
|
7-1/4”
|
Grid
Size
|
1”
|
1-1/2”
|
2”
|
2-1/2”
|
3”
|
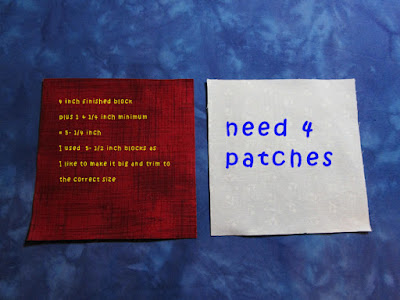
To make an hour glass patch you need TWO patches equal to 5-1/4 inch patches. ( I made my patches at 5.5 inches as I like to make my blocks bigger then trim them to desired size. ) To make the star you need 4 patches. Put the back ground ( white) right sides together with red patches to make the points.
Star points are suppose to be BLUE with WHITE!
FORMULA: FINISHED HOUR GLASS BLOCK plus 1 and 1/4 inch to cut the patches to make the block.
4 inch finished block plus 1-1/4 inch results in patches of 5 & 1/4 inch
This should work for any finished block size.
Mark the patch from diagonal to diagonal on both corners.
Sew the seam along the diagonal a quarter inch away from the diagonal lines. At the center of the block cross over to the other side of the diagonal and sew a quarter inch away. See the pictures below.
Sew the second seam a quarter inch from the diagonal, cross over at the center then once again sew a quarter inch away from the other side of the diagonal.
The picture to the right is the flip side of the patch, showing the stitching.
Cut on the diagonal from corner to corner on the patch in both directions. Press the patches open to the dark side.
I am missing a few pictures and will add them in when I have re- shot them.
Sew two of the patches to form an hour glass. Trim to the correct size. Trim carefully or you will loose the quarter inch seam needed to maintain your star points.
I lost the point on my star I will have to be better next time I make the block.


No comments:
Post a Comment